So, you’ve picked out your first pipe, tobacco, and you even know a little bit about the stem material. Now…how the hell do you get the tobacco in there?
Like so many things, we sometimes like to make packing a pipe more complicated than it needs to be. After all, part of the fun of pipes is the ritual and the best rituals tend to be a little over the top.
Before talking about my four favorite methods, a couple of caveats:
- These are not the only ways to pack a pipe.
- These might not even be the best ways to pack a pipe. The best way is the way that works for you.
- Keep experimenting. Some of these methods are relatively new, so never assume that there isn’t more to be discovered.
With that said, it is also important to keep one thing in mind that are widely agreed upon:Packing lighter is often packing better. When the pack is too tight, there isn’t enough oxygen for the flame to breathe and continue burning through the entirety of the bowl. Too light, however, means that the pipe might burn hot or there might not be enough tobacco touching for the flame to pass from one piece to the next. Springy, but not loose.
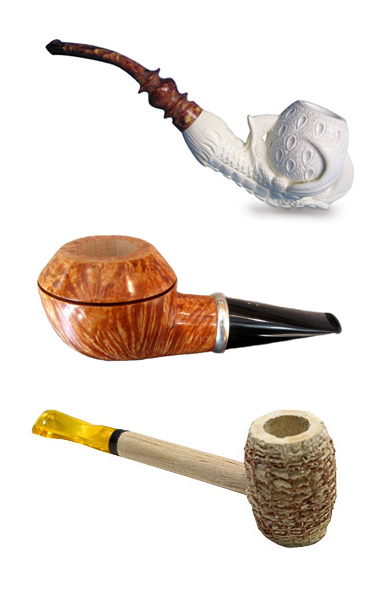
On to the methods! (All of these are intended for ribbon, shag, or rubbed out flakes)
Gravity Fill or Three Step Pack
- Drizzle tobacco into your empty pipe until tobacco reaches the top of the bowl.
- Push the tobacco down lightly using a tamper or your finger until it fills about 1/3
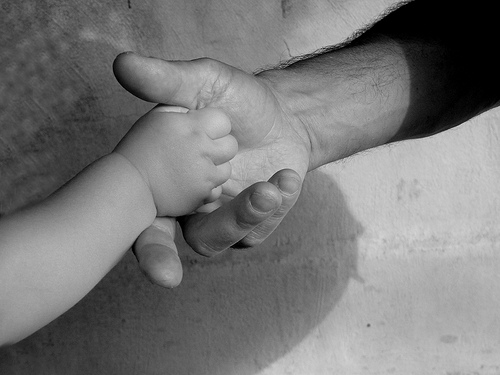 of the bowl. This tamp should be very light, some say like you would “shake a baby’s hand” as a way of remembering.
 - Repeat the drizzling until the tobacco reaches the top.
- Again, tamp down the tobacco, this time until about 2/3 of the pipe is filled. This time, use a little more force, “like you should shake a lady’s hand”.
- Drizzle more tobacco.
- Tamp down the tobacco a little firmer still, like you were “shaking a man’s hand”. Keep in mind not to pack too tightly.
If this is done correctly, you should end up with a fully packed pipe. This is hands down the most common method of filling a pipe. That doesn’t mean it’s the best, it just means the most common.
There is a reason for the different pressures in packing. By having one layer packed more firmly than the previous, it actually continues to pack down the previous layer, meaning that, by the end, you should have three layers of tobacco that are fairly evenly packed. This means that if you packed the first layer too tight, you will end up with the bottom layer tighter than the other two, which will result in a tougher draw and a less pleasant smoke.
The Frank Method
This method, though I’m sure it had been used previously by someone, gained fame from Achim Frank, apparently for competitive use. It is, however, wonderful for everyday pipe smoking and, for me at least, requires fewer relights than the previously mentioned method.
The basic premise is this. You follow step one from about, drizzling tobacco into the bowl until it reaches the lip, but you don’t push it down. Instead, you then form a plug of tobacco that is gently, but firmly, packed into the top of the bowl using your thumbs. The tobacco is pressed in from the sides of the plug, not forced in from the top; it is massaged into the bowl.
While it might appear, at first, to make the draw impossibly tight, due to the large wad of tobacco loaded into the top, this is not the case. You have, in fact, created a loosely packed area at the bottom of the bowl, followed by a tightly packed layer. This is the same goal as in the Gravity Fill Method, just achieved differently.
While a picture might be worth a thousand words, this series of videos by Mr. Frank himself is even better. Below you will find a link to the first of three videos. They are lengthy, but thorough. I will say one thing, however: I cannot recommend strongly enough against using a torch lighter for your pipes. It makes the tobacco hotter and runs a very high risk of scorching the top of your pipe, which is not a fun experience at all.
The Air Pocket Method
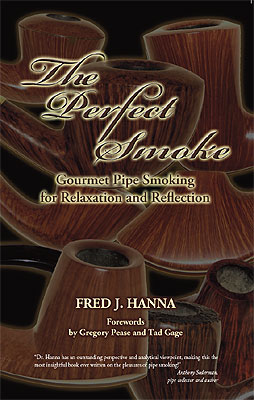 Fred Hanna has many claims to fame: he’s an incredibly intelligent and well-spoken member of the pipe community, has written countless articles, and has advocated the value of moderation. Perhaps more than anything is his advocacy of the Air Pocket Method, which is extremely similar to the Frank Method with a few differences.
1. Create a plug of tobacco using your thumb, index, and middle finger.
2. Without filling the bottom of the bowl with any tobacco, place the plug on top of the bowl and hold in place with your other thumb.
3. Firmly push the tobacco into the bowl, making sure not to put put pressure on the center of it.
4. Once a decent amount of the plug is into the bowl, start “screwing” the plug into the bowl as you push it down. This serves to entangle the tobacco further, purportedly making it easier for the burning embers to ignate more tobacco strands.
To make this a true air pocket method, you need to make sure not to have tobacco in the bottom half of the bowl. This empty half is the “air pocket” from which it gets its name.
The Palm Pack
This one is pretty new to me, but I am falling more and more in love with it. It follows a similar principle to The Frank Method and The Air Pocket Method, but the actual means of packing the pipe is unique, bizarre, and strangely effective.
- (Optional) Drizzle in a small layer of tobacco into the bowl. This can be skipped to simulated the effect of the Air Pocket Method. I choose to do it for no other reason than I am used to it.
- Loosen a fair amount of tobacco (enough to fill the rest of your pipe and a little bit more for safety’s sake) and rest it in the palm of your non-dominant hand.
- Take your pipe in your other hand and turn it, bowl-side down, on top of the tobacco.
- Now move your pipe around on your hand in a circular motion whenever there is tobacco. No need to do this quickly; take your time. If done while applying a slight amount of pressure, you will notice less and less tobacco in your hand as it is being loaded into the pipe. Do this long enough until you see that enough tobacco is missing from your hand. Return the remainder to the tin/bag/jar (waste not, want not).
- Now gently push down on the tobacco in the bowl. This is not to actually pack down the tobacco more, but just to make sure it is not overflowing.
- Take a test draw. If done correctly, you might be amazed to find that it is packed damn near perfectly.
This method has delivered fantastic results for me. I’ve shown it to a few of my friends and witnessed nothing but utter shock on their faces when they take a test draw to find the perfect resistance.
Beware: This method is not good for people with sweaty hands. The reason should be obvious.
For all of these methods, and every method, in fact, it is important to remember a few keys:
- The draw prior to lighting the pipe should have only a slight resistance. If there is too much difficulty drawing, dump out and start again. There’s no shame in that.
- Some people like to add a little bit more loose tobacco on top after the final step to encourage an easy lighting.
- Experiment. Experiment. Experiment. There is a missing element to all of these methods and that is you. You have to learn what is right for you or it won’t be right at all. Theory is great, but if it doesn’t work in practice, who cares?
So, what’s your favorite method? What have you found works best for you?